No, no, I have recieved no acceptance letters yet, but... the application is in!!!!!!!!!!!! I finished it last week (as in all of the supplements are in) and it feels good! I love feeling like I'm done. I've only done my BYU provo and idaho ones though. I can't decide if I want to do more or not. Any opinions? Anyways, just thought I'd let y'all know it's in and that I am very happy about that!
ps-cami, what do you want for figuring out how to change my template? thanks for the help!
Sunday, November 23, 2008
Monday, November 17, 2008
Oh the mysteries of keeping a blog!
Yes, I know, 2 blogs right after each other! What am I going to do! In fact, there may just be another one coming your way sometime later this week (note the "may"). I'm a little confused with this whole change the template of your blog thing. Clearly, I have changed my blog template, but I cannot get the previous template off of my blog and it is ANNOYING ME all too much. My new template is from a different website, you can be directed there from the link in the top right corner of my blog. My previous template was just one of the ones provided by blogger in the layout section. So, if you know the answer to my little predicament, being how on earth do I take that old template OFF my blog, I will love you forever. And, prize anyone (because my eternal love isn't enough??)? I'll offer anyone who can fix this problem of mine bragging rights for the rest of their lives!! So, any takers??
 And now... a peak into the my next blog....

 And now... a peak into the my next blog....
Sunday, November 16, 2008
Two Summers Too Late
Alas, finally, after saying I would for the past year, I'm blogging about my photography class from last summer (2007). It was a really fun experience and probably the only time I felt like I moderately understood the MBTA system, traveling in (and out) with two friends was a lot of fun. Anyways, so on with the photography: my class was color photography, which was a first for me (I took black and white at the high school). This time, we couldn't develop our film ourselves, it had to be sent out and done by other people (the chemicals used for color are different and too dangerous to meddle with, so it wasn't allowed, with black and white I was able to develop the film...it smells nasty in case you were wondering). So rather than explaining the process through words, I figured I would explaing the color photography [printing] process through pictures AND words! And so it begins...
1.
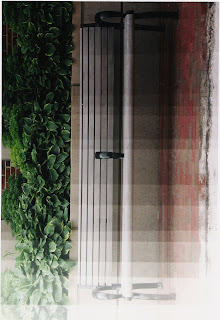 (please forgive the flipped picture... sorry!) once the film is back from being developed, you make a test strip to find the [ideally] perfect exposure for your picture. we do this by placing the negative in the enlarger, setting the lens up, and then putting the photo paper at the bottom of the enlarger. basically, you set the enlarger to expose the paper for certain short time intervals, on this picture, I think I did 2 seconds. You only allow a small strip of the paper to be shown each time you expose. after each interval, you add on another "strip" to be exposed. the side with the darker strips on this picture is the side that the first exposure was made. you do this until you get to the end of the paper.
2. (no picture for this part)
Then, you have to place the paper in a special light proof box and transport it from the dark room where you did all of that to a different dark room that has a big 'ol machine that processes the print (at least that's how they did it at AIB). When you get the print back, you look at the print and decide where the perfect exposure is. On this picture, it was somewhere around the middle (the strip to the right of the strip with the middle handlebar in it, so I think that's 16 seconds, I think...)
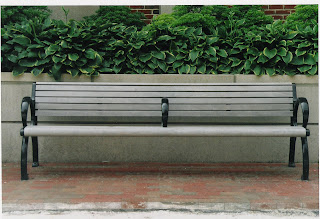
3. Then, you do the real picture. On this picture, I set the enlarger to expose for 16 seconds all at once, and then, hopefully it's done. you have to transport it to the big 'ol developing machine again, but that's pretty much it, assuming that it's a perfectly balanced picture...
but when it isn't:
-you can color correct a photo, which is generally necessary. in the enlarger, you can change the colors that expose the photo (please don't ask for an explaination, you wouldn't get a very thorough answer anywho). so you would just do different prints, adjusting the color meter on the elarger until you got a picture you were happy with.
-you can do all kinds of things to the print while you're in the darkroom too, it's lots of fun!
end product [drumroll please....]
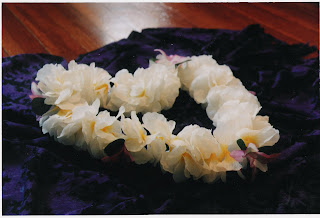
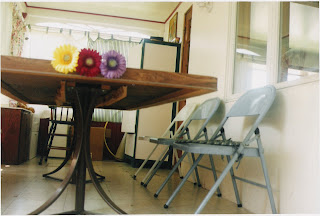
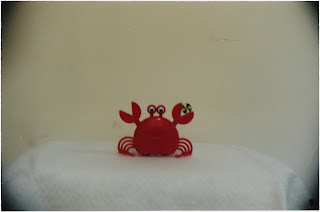
 here are some other ones too...
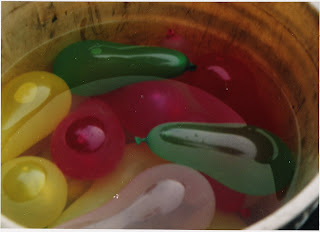 these balloons were from a water balloon fight we did. we put them in one of those weeding buckets. so it actually looks really gross and dirty, i'm not sure how i feel about that.
 on this picture, I burned the edges. basically, after your picture has been exposed you can put your hand over the lens and control where the light goes. so, I put it on the corners to make them look worn out/burned.
So, tada!! This was my summer of 2007, every Tuesday and Thursday of July! It was an awesome experience, and I had so much fun. I had so so many awesome experiences and was able to meet/befriend people who I would have never met before. I loved it!!
1.
 (please forgive the flipped picture... sorry!) once the film is back from being developed, you make a test strip to find the [ideally] perfect exposure for your picture. we do this by placing the negative in the enlarger, setting the lens up, and then putting the photo paper at the bottom of the enlarger. basically, you set the enlarger to expose the paper for certain short time intervals, on this picture, I think I did 2 seconds. You only allow a small strip of the paper to be shown each time you expose. after each interval, you add on another "strip" to be exposed. the side with the darker strips on this picture is the side that the first exposure was made. you do this until you get to the end of the paper.
2. (no picture for this part)
Then, you have to place the paper in a special light proof box and transport it from the dark room where you did all of that to a different dark room that has a big 'ol machine that processes the print (at least that's how they did it at AIB). When you get the print back, you look at the print and decide where the perfect exposure is. On this picture, it was somewhere around the middle (the strip to the right of the strip with the middle handlebar in it, so I think that's 16 seconds, I think...)
3. Then, you do the real picture. On this picture, I set the enlarger to expose for 16 seconds all at once, and then, hopefully it's done. you have to transport it to the big 'ol developing machine again, but that's pretty much it, assuming that it's a perfectly balanced picture...
but when it isn't:
-you can color correct a photo, which is generally necessary. in the enlarger, you can change the colors that expose the photo (please don't ask for an explaination, you wouldn't get a very thorough answer anywho). so you would just do different prints, adjusting the color meter on the elarger until you got a picture you were happy with.
-you can do all kinds of things to the print while you're in the darkroom too, it's lots of fun!
end product [drumroll please....]
 here are some other ones too...
 these balloons were from a water balloon fight we did. we put them in one of those weeding buckets. so it actually looks really gross and dirty, i'm not sure how i feel about that.
 on this picture, I burned the edges. basically, after your picture has been exposed you can put your hand over the lens and control where the light goes. so, I put it on the corners to make them look worn out/burned.
So, tada!! This was my summer of 2007, every Tuesday and Thursday of July! It was an awesome experience, and I had so much fun. I had so so many awesome experiences and was able to meet/befriend people who I would have never met before. I loved it!!
Subscribe to:
Comments (Atom)
![Laree's Little [B]Log about Life](https://blogger.googleusercontent.com/img/b/R29vZ2xl/AVvXsEjMyTZ-l-W5G1q7Hz1xX9NtHgKsxuoWAXzMIP0lpjq9N4DYKcqqzF1-zi44xuHrbLe8O3GsfLEzJn8q9M6CHupRnLI0bo3Vsdary0Br027BKe8YiSxT0647NUJvc5gcKNs2jInExXrg6_o/s1600/bacgrd.jpg)